Slow starts are beneficial to almost anything outside the scope of competition, especially in elements that must be exercised to develop strength. The best way to attain longevity in machines (or in this case, circuits that support a load) is to allow them an ample period of warm up prior to loading them.
Electrolytic capacitors are the Achille's Heel of old electronic circuits.
They function by means of a chemical electrolyte suspended between two electrodes, the chemical component
will over time decompose.
I think of it like the crystalization of honey. It is an unstoppable process that can only be delayed with
regular use. When a device has sat on some back shelf for the last 20 years, it is highly likely the electrolyte
is in sorry shape.
Plugging a device that has been doing nothing but catching dust for the last decade or so right into the wall
and firing it up is like having the aforementioned crystalized honey suspended in the running gear of a car. An
attempt to drive such a vehicle will typically result in premature wear or catastrophic failure depending on which way your
luck has bent.
This is loosely analagous to what is going on when a dried up capacitor is suddenly hit with full voltage.
It can arc across the dried stratification of electrolyte and incur permanent damage to the capacitor,
and through the caps failure, the circuit itself.
To ride that honey analogy one last time, the burn in process is similar to warming the honey back into its
fluid state before use. Ever notice how once honey has crystalized it has a tendency to recrystalize at a much faster rate?
I should stress that electrolytic caps that are over 20 years old will need to be replaced; sooner is generally
better than waiting out the inevitable failure. That said, I like to attempt to burn in a device before doing any
work on it, to get a better idea of what it's going to need and what it's capable of doing. This gives me a chance
to make an informed decision on whether or not I should invest further time and money on it.
There are two approaches to easing a unit up to operating levels, lowered voltages or current starving.
A variac or variable autotransformer is a highly useful tool in working on tube circuits; it will allow you to
vary the AC wall voltage from 0 to 100% or more. Unless you intend to work on high voltage tubed stuff somewhat
regularly, it's probably unrealistic to expect you to have one on hand.
You can build a current starve box fairly easily with common electrical parts. In the simplest form, it consists of two AC outlets wired in series and a lamp with incadescent light bulb. The unit under test is plugged into one outlet, and the lamp into the other. This more or less forms a voltage divider, and all current has to pass through the bulb, which makes a good bottleneck. Different wattage bulbs can be rotated in to provide different levels of starve.
Here is an image, in the event my oversimplification has raised any questions:
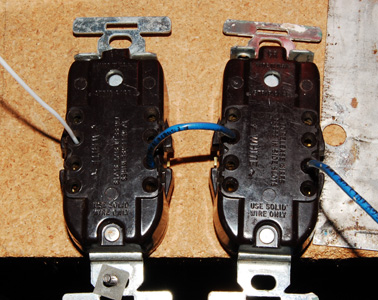
Naturally, this should be in an enclosure, wired with acceptable wire. I'd advise use of a GFCI outlet for the unit under test.
I have noticed a variety of techniques regarding the implementation of a variac to slowly burn in equipment, often bearing the authors assertion that process Y is recommended over process X for some reason or other. I will not bother you with my opinion on the matter, I will simply state the way in which I tend to go about things.
I'll spend some time meditating on the guts of the unit. Leaky or scorched parts are replaced before proceeding.
If the device under test has a tubed rectifier I will generally start things off between 50 and 60 volts, and let it stew there a while. I realise a "while" is a vague term, and in this instance it generally means no less than half an hour and on occasion has dragged out for several hours. This is because I'm usually doing other things and sometimes get wrapped up in other projects. I have starved a tube amp at idle for over 12 hours in the past before to no perceivable negative effect.
If the device has a solid state rectifier I will slowly ramp it from zero to around 30 to 40 volts or so before letting it stew. In this instance, slowly generally means as slow as I can move, or gentle couple volt nudges every minute or so.
After it has had a chance to dwell at the (noticably different, depending on rectifier type) stewing voltage for a while, I'll take take voltage readings at various points in the circuit and check the power transformer and power supply capacitors for signs of heat. If either of those components are hot to the touch at this lowered voltage level after that amount of time (at least a half hour) chances are there is a short that needs addressing.
I guess I should explain the difference in voltages as decided by the rectifier topology. A tube rectifier conducts electricity only after the filament has reached a certain temperature. A certain amount of supply voltage is required before it begins to conduct, and even then the electrons are faced with a span of evacuated space that must be breached in order for the required DC to develop. It could be said that vacuum tube rectifiers follow a logarithmic curve in this process. However solid state diodes only really need a fraction of a volt to start conducting, and follow a more linear curve.
Anyway, once I get more comfortable with the unit under test I'll start to ramp the voltages up gradually. If it's an amp, it will have a load put on it, if it's a generator I usually plug it into monitoring system to listen. My standard approach is 5 volts or so every 10 minutes/so often, only to really start creeping up on it once it's within 10% of full voltage.
During this process, I tend to keep tabs on the B+ voltage and capacitor temperature. The power transformer will get warm as standard, but it shouldn't actually burn you if you touch it. Electrolytic caps should not create heat. They will be warmed by adjacent tubes in poorly laid out designs, but if it is hot to the touch there is a strong possibility that it is shorted and needs to be replaced.
I follow the same approach if I've just recapped it. Just because a cap is new doesn't mean the electrolyte is formed.
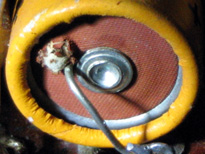
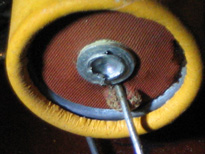
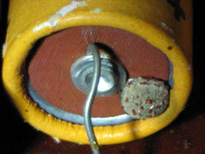
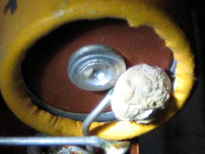
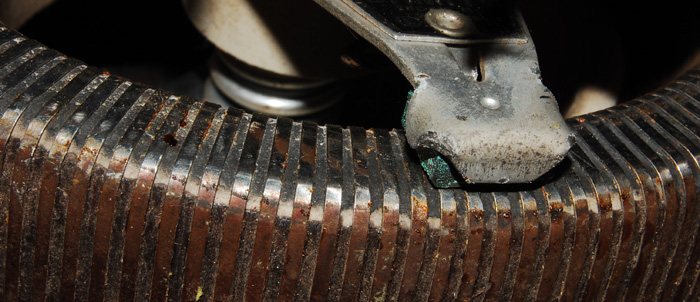
Caps degrade with time, whether used or not. I think the failed caps pictured at the top popped open without the application of electricity. Keep this in mind if you come across some new/old stock electrolytics, they can be more trouble than they're worth.